
Walking around a classroom and holding things up doesn’t do much for the people at the back, let alone a lesson’s efficiency. Projectors and acetate sheets do alright, but sheets are a static resource; you can’t project a 3D model.
There’s a place for these things and a place for their upgrade, the classroom visualiser, a camera device that displays whatever’s underneath it on a display via a digital feed, be that a paper sheet or a circuit board.
Teachers can face the class and write and demonstrate using a visualiser, rather than walking around it or turning their backs to a board and scribbling away.
Practical uses for visualisers in schools
Teachers use visualisers to:
- Model and explain their writing. They write and talk, and students can see and hear their reasoning. Even students who learn best by doing stuff benefit.
- Show and share documents instantly. No different to a projector, except the image is in high definition and the teacher can take images and record videos.
- Throw some homework under the visualiser, or a textbook, and explain how students can change their thinking and do better.
- Annotate text. Lessons and topics up for discussion are interactive without students doing the writing, freeing them to debate and think out loud.
How classroom document cameras work
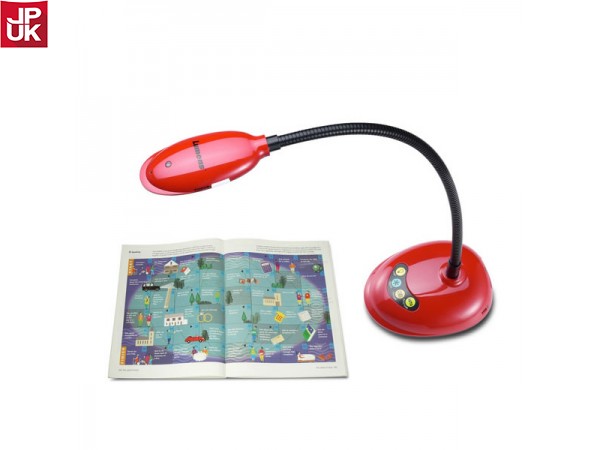
A camera on a stick, if you’re so inclined, although the stick is actually an adjustable arm with bolts for tightening, and the camera has a field of view that is appropriate for the surface area below it, letting teachers capture images of almost anything.
Connection to displays happens via USB, sometimes HDMI, and increasingly, a wireless connection such as Bluetooth or Wi-Fi. The camera captures in real-time, so anything under it gets shown to the class perfectly well.
Some visualisers for teaching have software, which is usable on a PC, but it isn’t standard, and plenty of models provide only an image feed.
Why teachers prefer using visualisers
Because setup is as fast as connecting it to a display and turning the visualiser on. Or, just turning it on when the connection exists already.
Plus, the camera feed is instantaneous, and provided it has auto-focus, a good image is guaranteed regardless of what you put under it.
The alternative is old-fashioned, bordering on bleak:
- Writing on a whiteboard equals having your back to the class and students messing around and not listening. Those with bad eyesight won’t thank you.
- Walking about holding something takes absolutely ages, and not everyone is guaranteed to see it.
Visualisers in schools make sense wherever projectors don’t cut it and when class sizes demand a more efficient demo approach.
The best feature of any visualiser is its recording. Teachers can record their sessions, and that makes losing notes and evidence a thing of the past.
A spec rundown for visualisers
- Image pickup: The sensor. CMOS is typical.
- Effective pixels: The resolution, such as 1920 horizontal x 1080 vertical.
- Frame rate: FPS, 30 is normal, 60 for high-end visualisers.
- Zoom: Nearly always of the digital kind, up to 8x zoom is decent.
- Shooting area: A3 or A4. A bigger area is better in general.
- Modes: Image rotation is important, as is microscope mode.
- Software: With or without, depending on the model. Some Epson visualisers come with interactive tools, for instance.
If you’re sold on a classroom visualiser, you can find our complete range here or contact us for advice:
- Telephone: 01924 423 111
- Email: info@kpms.co.uk