
If you go back thirty years, teachers were writing and illustrating on blackboards with chalk to engage students in the classroom. Ten years later, whiteboards moved the game on with dry erase ink, but this was hardly a technological revolution.
The first interactive screens, introduced in the 2010s, were a technological revolution, bringing centralised collaboration to lessons. Content could be pulled from the internet (or local storage) and students could engage with this content, bringing about what we now call ‘active learning’ (in which students engage with content to learn).
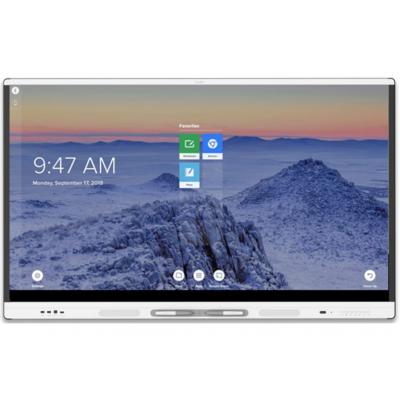
Interactive screens are a powerful tool for classrooms because they enable not only active learning, but collaboration, demonstration, and experimentation as well. They are far more than glorified TVs on which to click through presentations.
If you are sold on the idea of interactive screens for classrooms, here’s what to look for and how to choose the right model:
Size
Like televisions, interactive displays are measured in inches. They range in size from 50” to 98” with the most popular sizes sitting in the middle. It’s important to measure the space on your classroom wall and choose a size based on this.
Resolution
Resolution is how sharp a display is. The higher the resolution of a display, the crisper the image will be. For example, a 4K display has a higher resolution than a 1080p display. The effect of a low resolution is more noticeable on larger panels, because you can make out the individual pixels (squares) in an image.
In today’s classrooms 1080p is the norm. This is full HD. High Definition 1080P (1920×1080) will give you crisp images. 4K is even better.
Something to keep in mind is if the PC you use with your interactive display has limited graphics capability, you will only be able to display content in that PC’s maximum resolution. For example, if your computer can only display graphics that are 1366×768 (760p), then your display will only show that resolution as per your PC.
Built-in PCs
This is where the biggest differences between some interactive displays comes in. Some interactive classroom displays are self-contained computers, so they do not need the use of an external PC. They can have in-built software, like captioning software and text-to-speech software, as well as lesson apps and collaboration tools.
Most models with a built-in PC run Windows 8 or Windows 10, depending on when they were made. Some variants also run Android, although these are rarer because they tend to have less features and less software compatibility.
If you choose an interactive display without a built-in PC, all you have to do is plug in an external PC. You will be supplied software for your PC which will automatically boot up when you connect your display to your PC. The process is relatively seamless, and it also has the benefit of allowing you to upgrade your PC.
Touch compatibility
Some of the earliest interactive screens for classrooms had resistive touchscreens (you may remember using touchscreens of this type – you apply pressure to the display to get it to do anything). Displays are now capacitive, meaning they interact with your touch on contact. However, not all displays are touchscreens.
Some interactive displays use pointers, and some use a stylus. There is nothing wrong with these per se, but they aren’t as sweet to use as touchscreen displays. If you like using your smartphone or iPad, touch compatibility will be a must.
Some screens also come with a pen and these are useful because they also have pen software, allowing you to highlight and annotate things easily. Smart pens are a good add on for classrooms. For example, Sharp displays have Pen Software.